Building the Tiny Cabin Frame

The plans we have require nine deck blocks ($6.22 each/$55.98 total), two 2’ x 6’ x 16’s ($9/$18), and thirteen 2’ x 6’ x 10’s ($5.39/$70.07). We had spread the gravel, but we knew that the surface wasn’t level. So, once we set out the deck blocks, we not only had to make sure that the deck block itself was level, but that it was the same height as the other eight. The back right corner seemed to be higher than the rest, so we decided to make that one the measure. We knew the guesswork would take a while, but it is absolutely essential that the blocks be even. It’s worth the time and effort.

Building Materials: boards, joist hangers, insulation, and chicken wire

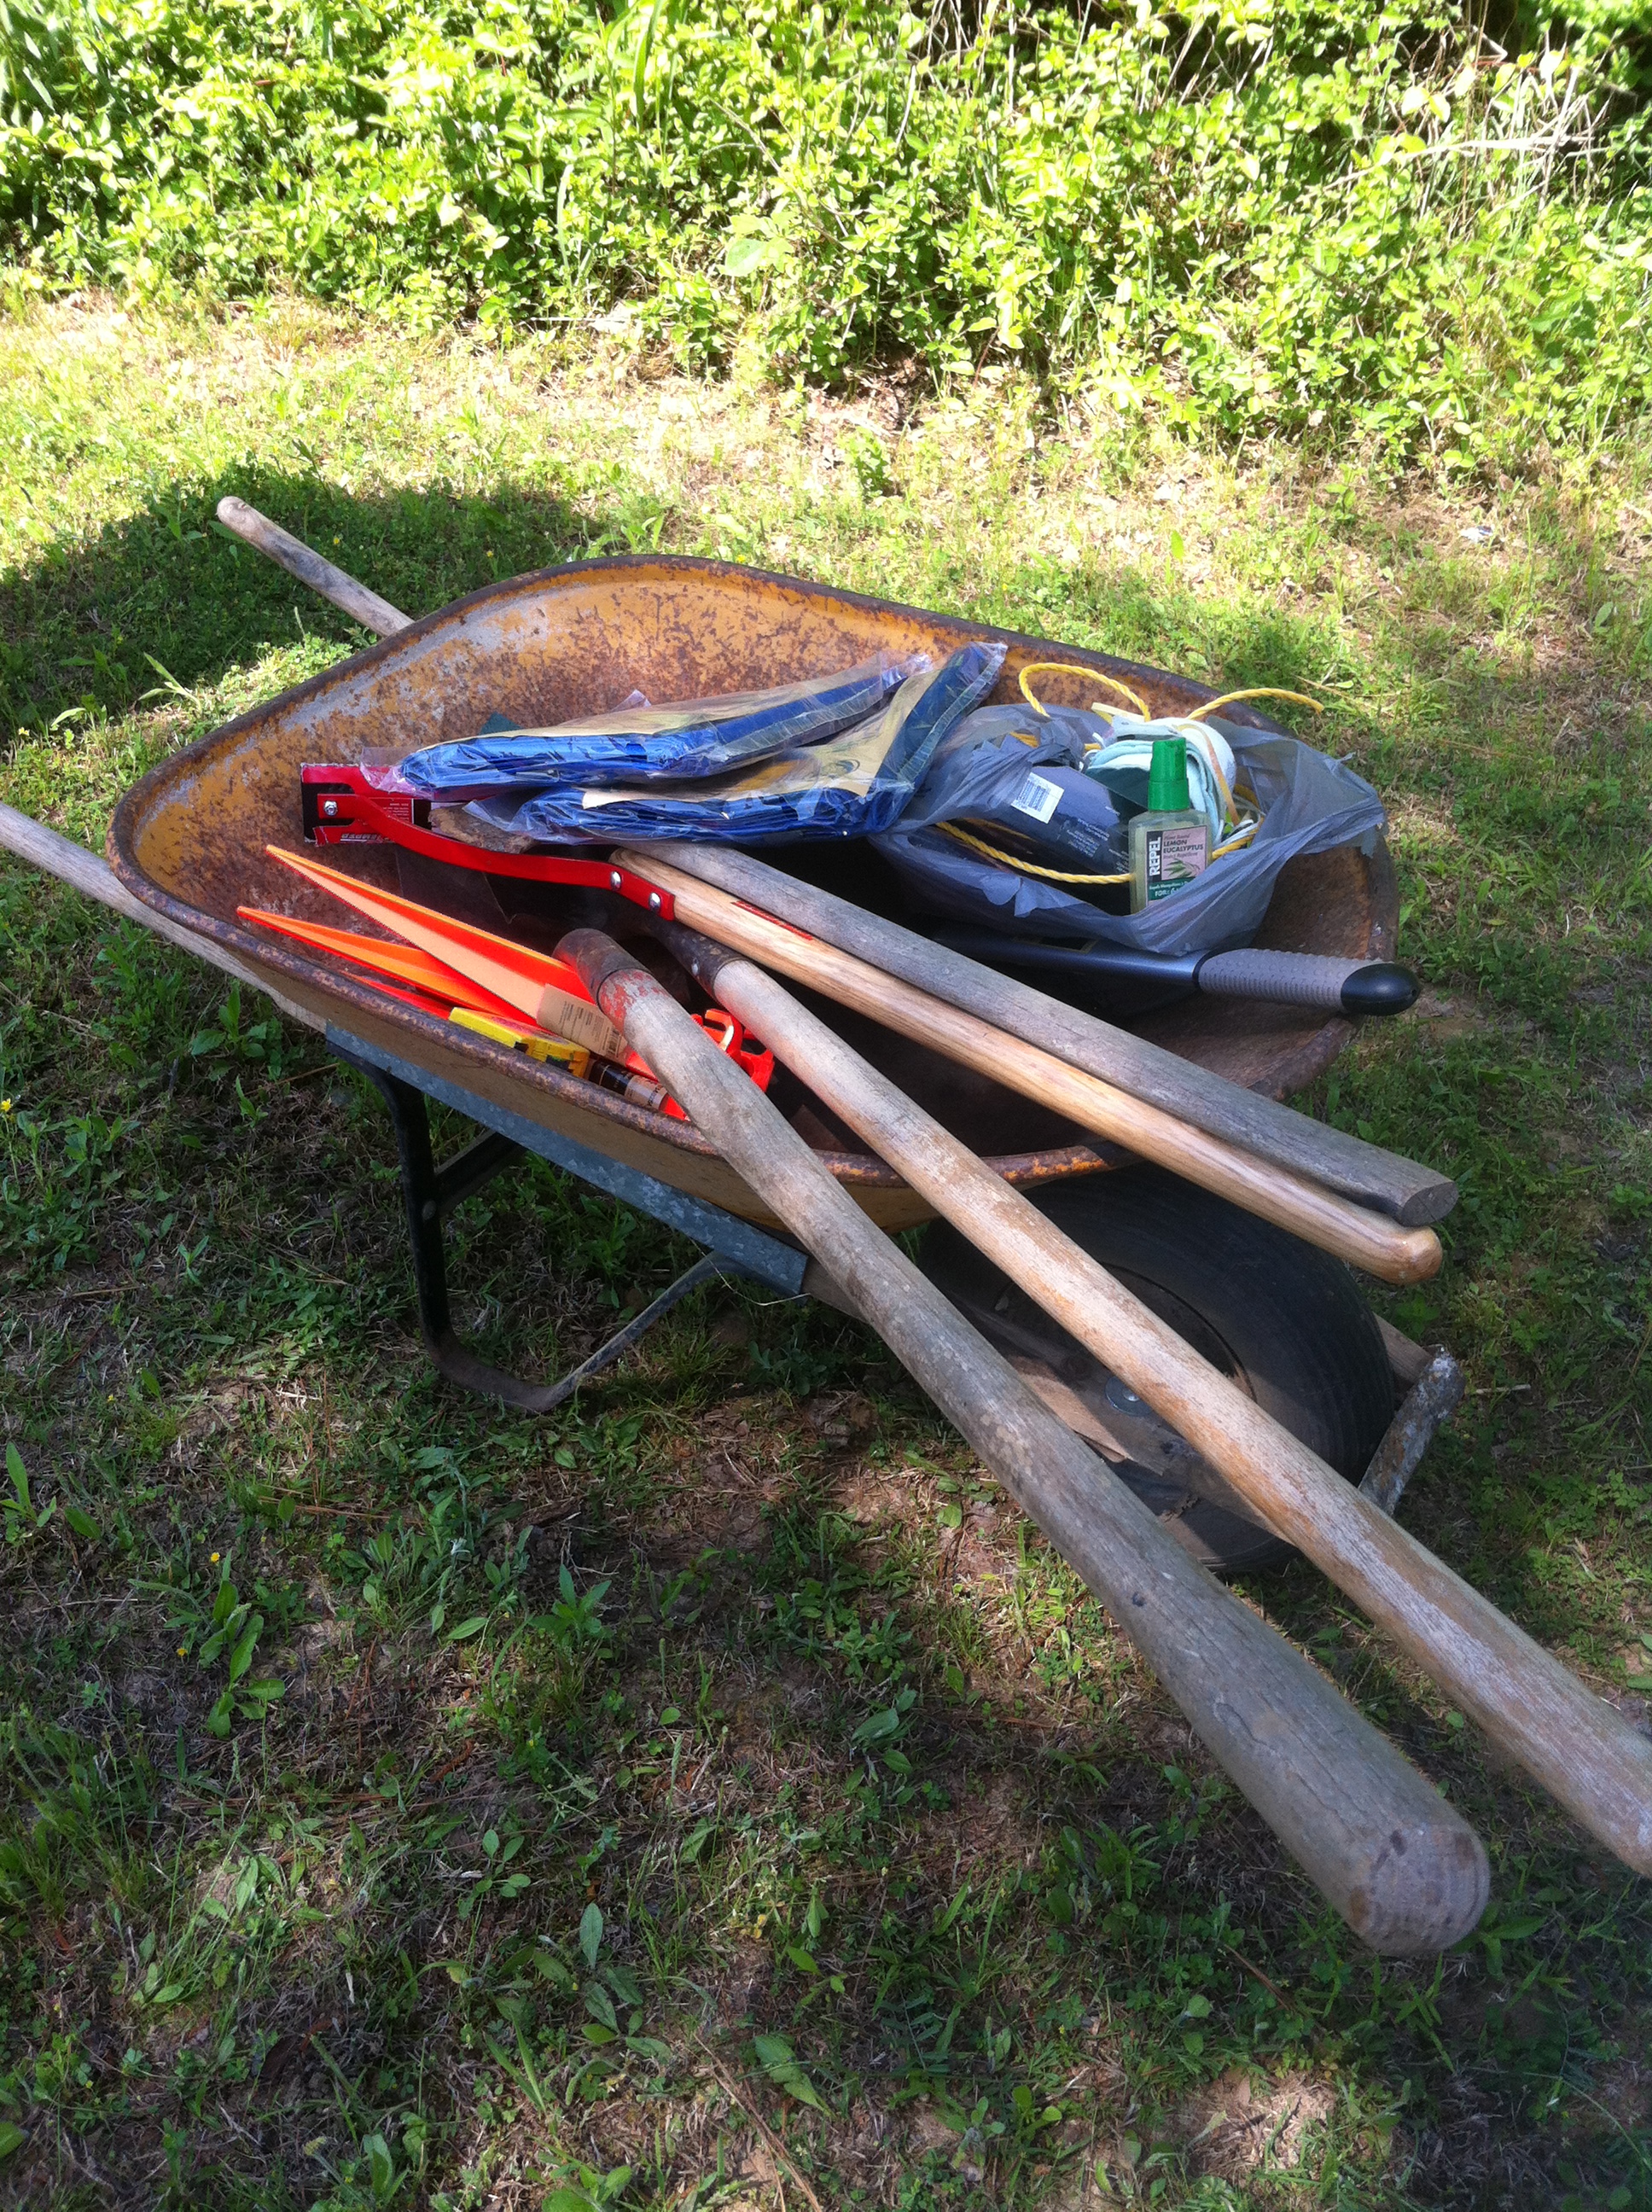
Building Materials: boards, joist hangers, deck block insulation, and chicken wire

We added gravel to raise the back left corner and then put a 2’ x 4’ x 16’ board between them. We then placed the level on the middle of the board. If the bubble lined up, we knew they were the same height. We were surprisingly good at judging how much gravel to add to make the four pillars the same, but the deck blocks themselves were rarely level on all four sides (the smaller the space to level, the more difference one millimeter makes). Chuck raised the heavy block while I added anything from stones to a fine layer of gravel dust. We also had to make sure that the surface was packed down well to reduce the chances of the block shifting.

First Nails

It was time to nail the boards together. We started with the same back corner. Chuck drilled holes first to make driving the nails easier. I held the boards and flush as possible as he nailed. We repeated the process until we had finished the outside perimeter. One of the boards split—the nail probably hit a knot in the wood—so Chuck reinforced it on the outside with additional nails. We might have replaced it altogether had the other end of it not already been nailed to the back board.

Luckily, it's not as bad as it looks.

Luckily, it’s not as bad as it looks.

We then used the square (an L-shaped ruler) to make sure the boards had gone together at a perfect right angle, which is harder than one might think. I held the long end of the ruler flush against the 2’ x 4’ x 16’, which we had decided was the board by which the angle would be measured. In a perfect angle, the short end of the L would fit perfectly up against the other board. In our case, however, the end of the ruler made contact with the board, preventing the rest of the ruler from making contact. It was about a millimeter off.

All is not lost when this happens. Chuck took the rubber mallet and hit the wood while I held it tight (obviously, we didn’t want to hit the wood while it was sitting in the carefully-placed deck block). The mallet bends the wood ever so slightly, and we were able to get more of the square flush against the board. It wasn’t perfect, though. Still, all is not lost: later, when we nail the plywood (or OSB) down to the frame, it will help cinch the discrepancies.

Cabin Frame

Between crouching, lifting, and concentrating, we were pretty worn out by the time we finished, nearly five hours after we started. We had hoped to put in all the cross-beams, but instead we had to cover them with the tarp and leave them for another day.

Gravel for the Tiny Cabin Site

We ordered a load of gravel–about 20 tons–and had it delivered to the site. The driver was nice enough to not only back up between the trees and dump a pile where the cabin will be, but also sprinkle the rest along the driveway, reinforcing what was already there and adding an additional strip.

On the day it was delivered, we had the first good rain in weeks. Of course, the downpour began just as the driver arrived and ended just as he was leaving.

gravel driveway

We went out to spread it the following Monday–a lovely, but sunny, 92 degree day. It was a bit warm for mid-October in Arkansas, but it’s been an odd year here.

Gravel 2

Whenever I worry that our 160 square foot cabin (plus loft) will be too small, I remind myself how much work it would be to build anything bigger. I’ve never built a house before, but I’ve noticed that in life, upgrading comes with additional commitments. For example, a nicer car comes not only with a higher payment, but also with higher insurance rates and maintenance costs. More specifically, just this weekend, I learned that buying a $99 cordless reciprocating saw also requires buying blades and a $130 battery and charger. What I originally guessed was a $100 purchase turned out to be $250.

A larger cabin may be in our future someday, but this is one adventure on which I prefer starting small.

Spread Gravel

An hour of spreading gravel was about all we could stand. This weekend we’ll make some small repairs to the camper–it should finally be cool enough to sleep there–and then buy the deck block and other materials we need to build the floor.

Clearing Land by Hand: Before and After

wheelbarrow

Some gasoline had spilled in the wheelbarrow, so we drove the hour to Searcy with the windows down. It was 7:00 am and a refreshing 64 degrees.

If only we had been able to go straight to work! Chuck had to give a final exam, so we didn’t get to the land until 11:00, when it was 84 degrees and the sun was almost directly overhead.

Chirping followed wherever we worked, with one bird louder than the rest. It was as if the birds had designated a reporter to keep up with our whereabouts. I’m glad we waited to bring the weed eaters, preferring to see how far the hand tools could get us.

driveway before          driveway after

Based on the before and after pictures, I think they served us well. Granted, I took a three hour nap when I got home. We still have to fill in the ruts in the “driveway.” Luckily, there’s a pile of dirt around the bend.

house area before          house area after

The blue spot in the picture is the tarp we laid over our supplies. It’ll be a few days before we get out to the land again–grading takes precedence, not to mention there’s an 80% chance of rain this weekend. Plus, we have some planning to do and decisions to make.

Things I learned: don’t forget a ponytail holder and wear long sleeves (bugs bite, branches are sharp).

Tiny Cabin

My husband Chuck and I are building a tiny cabin this summer on seven acres with a pond just outside of Searcy, Arkansas. I’m looking forward to breathing fresh air and living more sustainably.

We have a little experience with carpentry, but this will be our first ground-up project. The “Thoreau cabin” will be 10′ x 16′ with a loft. We’re also adding a small front porch and a screened-in back porch. Though we still have some details to work out, we’re going off-grid, using solar power and rain water.

We purchased the plans from solarcabin–watch his 3-minute video for the “Thoreau cabin” here: https://www.youtube.com/watch?v=NTT5kC4V54o

Tomorrow we begin clearing the chosen spot. The car is loaded with shovels, a wheelbarrow, weed eaters, bug spray. and a first aid kit. What we bought: tarp, rope, gloves, clippers, stakes, a straw hat.

May in Arkansas is lovely. The weather should be great, though there’s a 20% change of a “stray thunderstorm.” Even so, it’s all part of the adventure!