Tiny Cabin: Fire and Rain

One week we’re burning the brush pile in 39-degree air; the next, we’re sweeping water from the cabin floor in a humid 75 degrees.

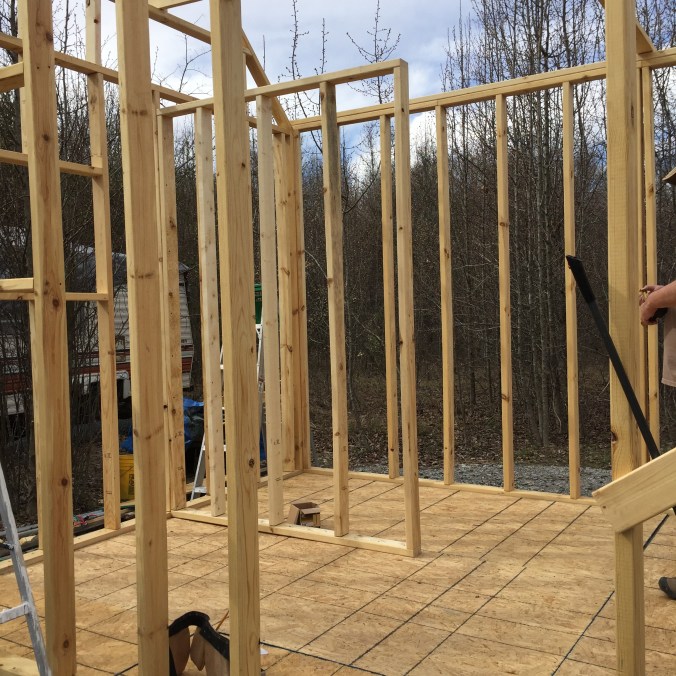
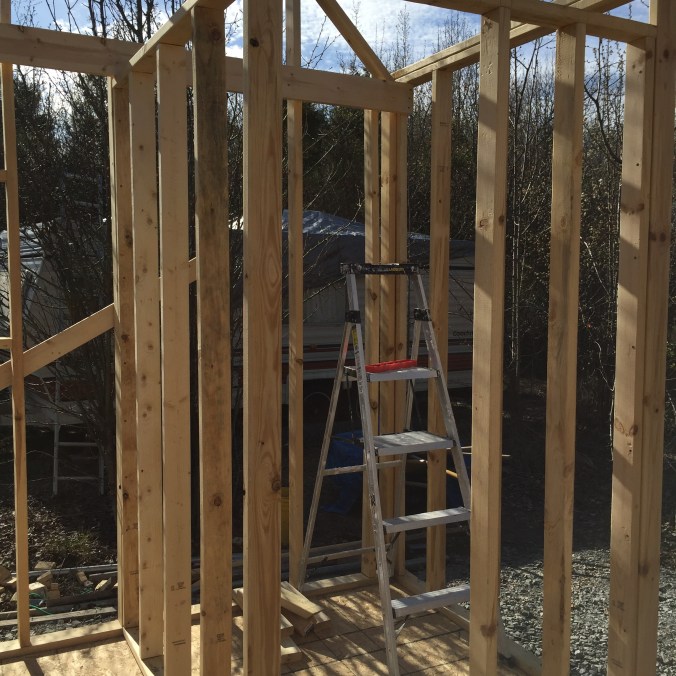
Completing the rafters last Saturday was a high point in our cabin building. My brother-in-law came to help, and by afternoon all 18 rafters were up. The day could not have been more beautiful, even if the sun left its mark on our bodies.

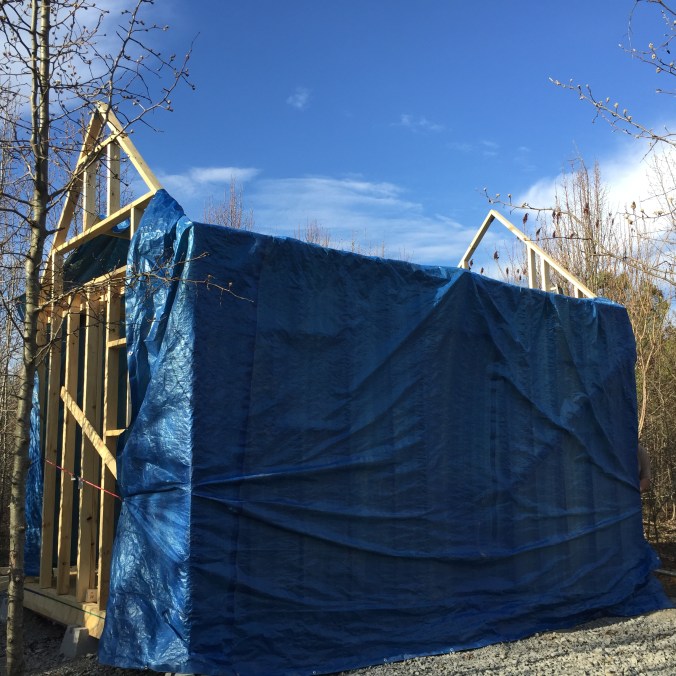
We knew that six straight days of rain were ahead, so we covered the cabin with a tarp and put some plastic sheeting over the floor. The rain began Tuesday night, and when we went Wednesday afternoon, the land surrounding the cabin was a lake.

The water went past our ankles and soaked Chuck’s pants to the knee. Luckily, I had my rain boots on, though I discovered the left one has a hole.

In spite of our bungee cords, the tarp had blown off one side and rain was pouring in. There were already several inches of water on the floor. Using a long pipe as an extension, we were able to move the tarp over the rafter peak and re-secure it. We splashed back to the car knowing that five more days of rain lay ahead.

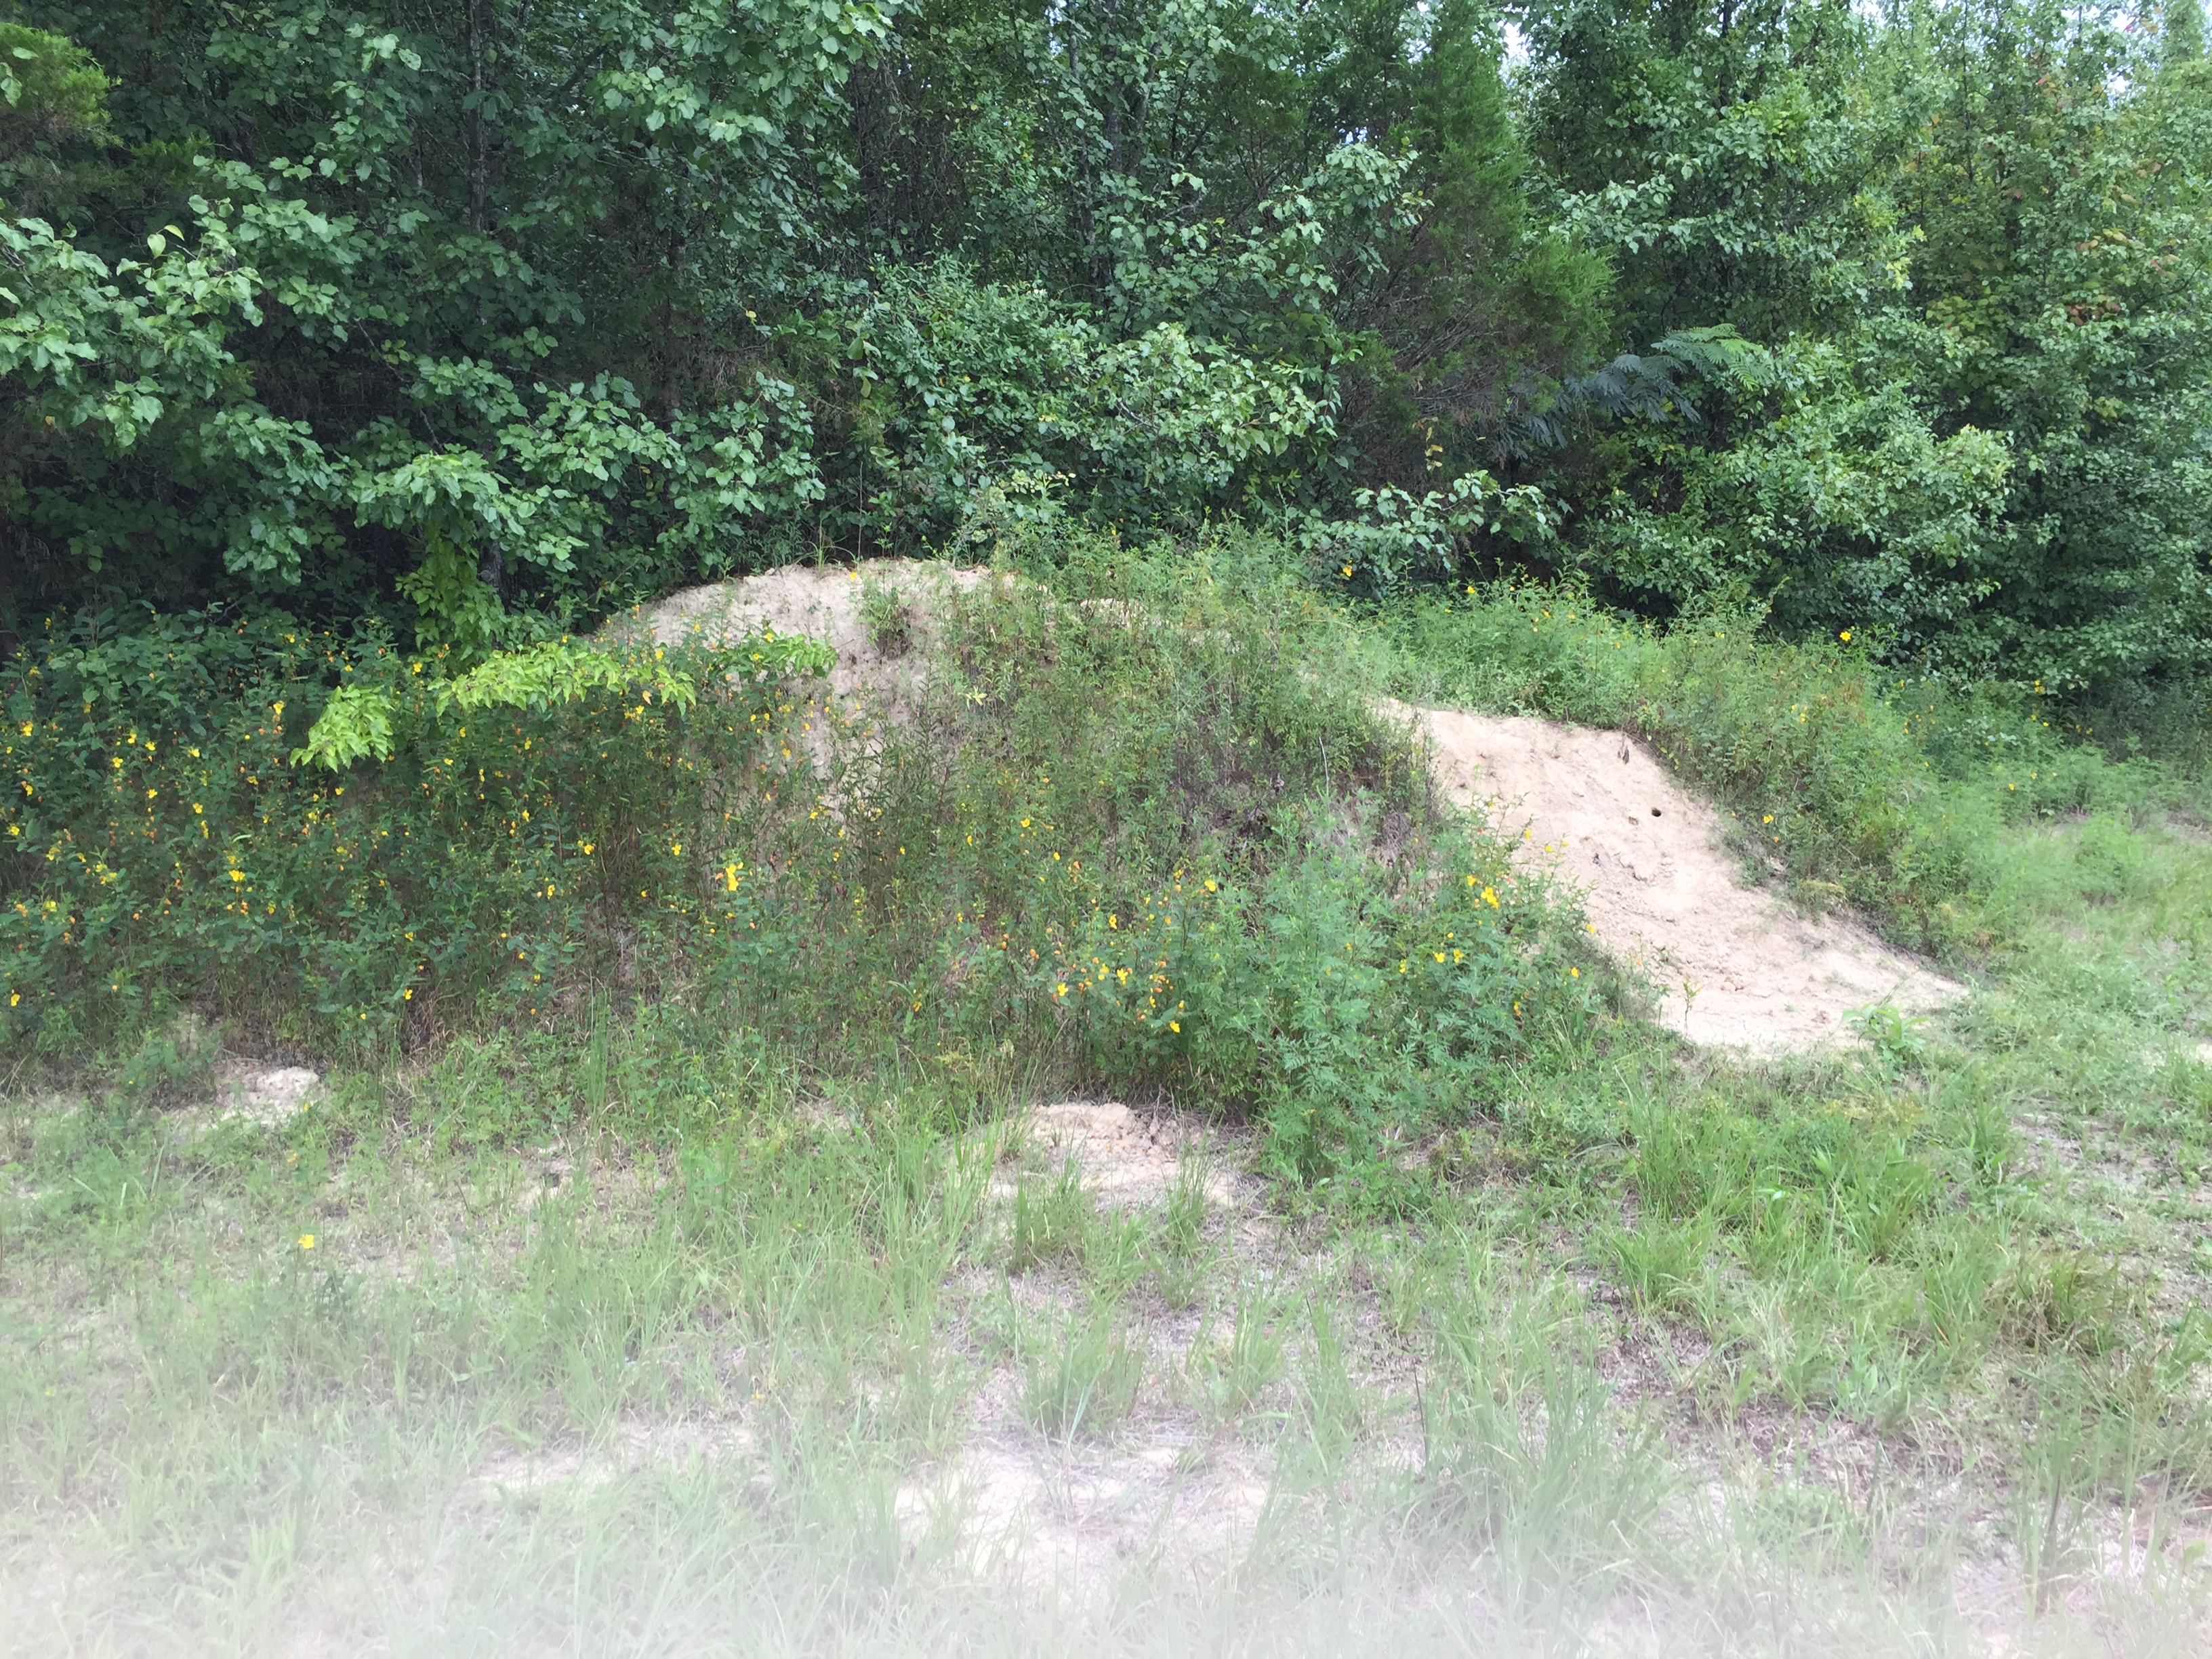
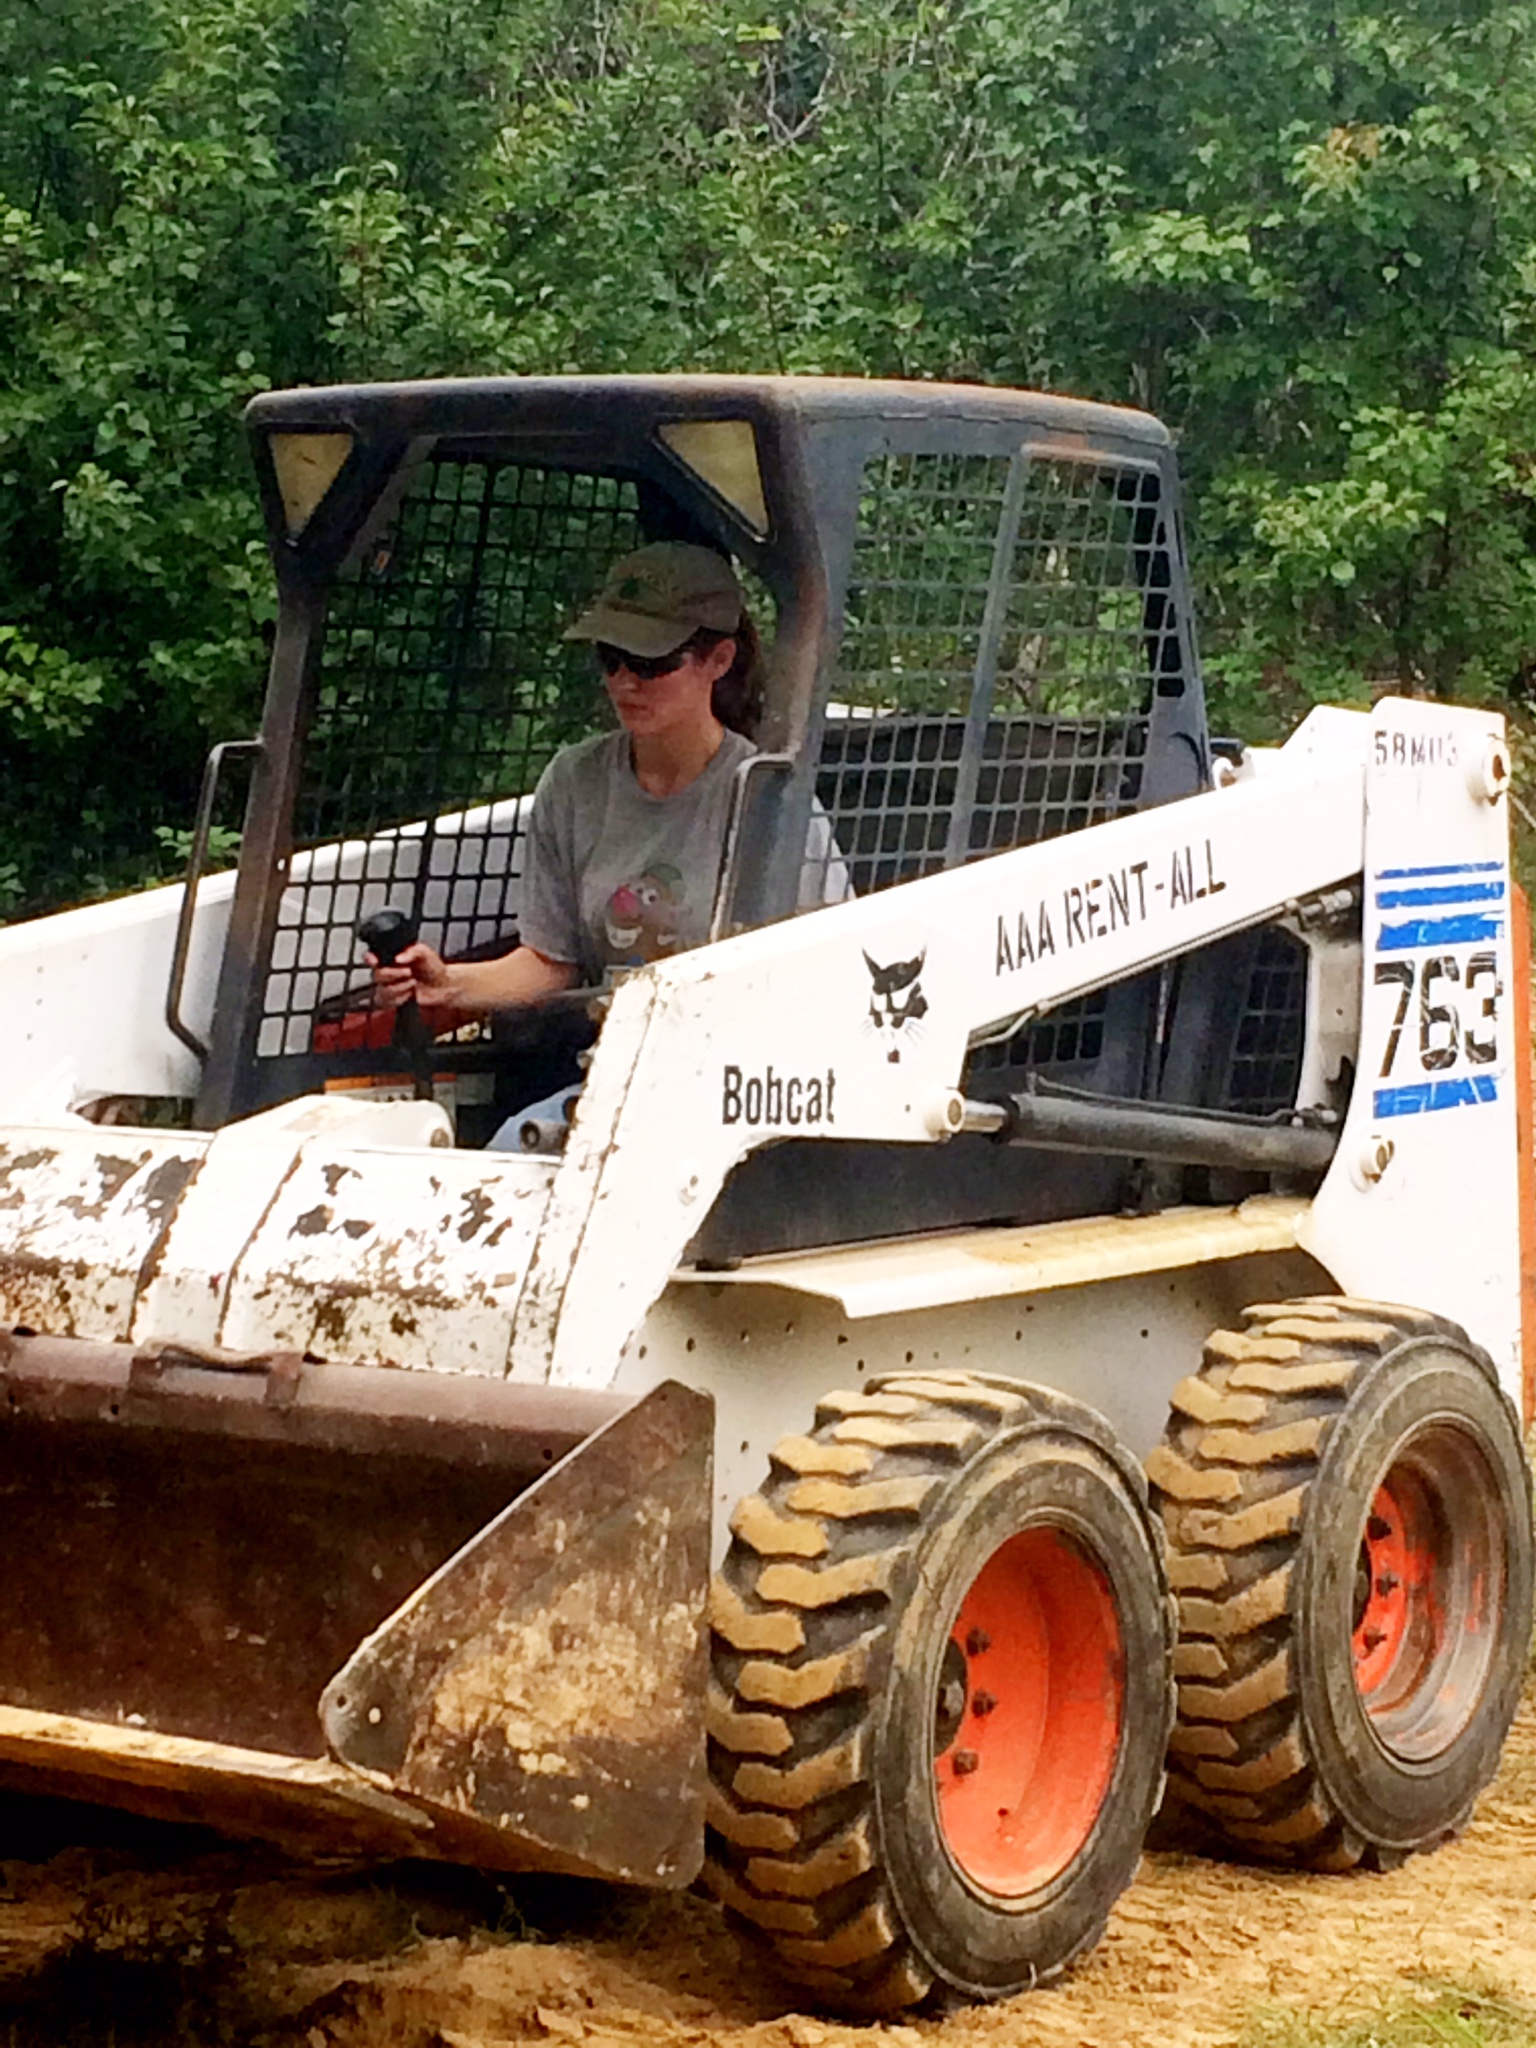
There was a possibility that the water would keep rising until it engulfed the cabin floor. In that case, we decided we would haul in more dirt and rebuild. Though we would like a cabin built on land, we also considered that we might have to build on a trailer bed. We decided that at some point we would have to cut our losses and run—how many thousands of dollars and hundreds of hours are we willing to spend on a thorny Bradford pear plantation?

Thankfully, the waters receded and we didn’t have to act out any of our worst-case scenario plans–at least not yet. More rain is forecast for tonight, and we will have to see how well the floor dries out this week.


Tiny Cabin: Building the Bathroom Walls

I surprised myself by nailing together the bathroom walls in less than thirty minutes. However, we immediately realized that the 8′ studs were so tall that our loft would be cramped. (Though we are following a set of plans, we have made modifications, which indirectly affect other things…)

Bathroom wall

The walls came apart quickly. Chuck trimmed them down once we had settled on the best height. I put them back together, undaunted–time was on our side. Or maybe the act of banging nails was so deeply satisfying that I didn’t care.

In fact, later, as Chuck went to buy the 2′ x 6′ boards for the loft, I nailed down an additional sub-floor. The OSB we originally used had too much give, so we decided to add a layer.

We raised the bathroom walls and connected them with a small metal plate. One of the bathroom walls will brace the 2′ x 6′ loft boards in the middle. No bigger than the loft is, the boards (which will be nailed into the studs of the front and back of the cabin) would have held us without the additional support. Still, it certainly can’t hurt, and we like the aesthetics of it.

Bathroom wall upBoth bathroom walls up

Building the bathroom frame has inspired us to do more research into how we will get water to the bathroom. We have vague ideas of how to catch, filter, and heat it, but soon we will need to fine-tune our logistical plan. Luckily for us, so many others have solved these problems and generously shared their experiences. We know that it isn’t a question of if, but how.

A <2 minute video on off-grid plumbing

An article on tiny-cabin plumbing

Rain was in the forecast, so we spent nearly an hour getting the tarp over the walls. With tired arm muscles, such a task is all the more challenging.

Tarp covering the tiny cabin

Tiny Cabin: Four Walls!

Chuck and I knew that putting up the walls on the tiny cabin was (ideally) a three-person job, but until minutes before heading to the land, we thought we would be alone in our pursuit. In fact, we were debating if we should even try–it was all four walls or nothing. We didn’t want a repeat of the front wall falling over in a wind gust.

As it turned out, my father-in-law beat us to the cabin site!

The walls have been finished since December, but good weather plus time off work have not been synced. We finally had our chance: last Saturday was a nearly 70 degree day. What’s more, this week is Chuck’s spring break, so we knew we would have time (and, luckily, good weather) to continue working on the cabin after the walls were up.

I have to say–my father-in-law really knows what he’s doing. Not that we don’t have some idea, but we occasionally we hit a snag that causes us to question ourselves, which takes up time.

In a matter of hours, all four walls were up, complete with California corners and additional supports. We still have some windows to finish framing, but time, for a change, is on our side. We left when the sun began to slant below the horizon, tired yet triumphant.


Front Wall Down

While the front wall held up in spite of storms and six inches of rain at the end of November, this time we weren’t quite so lucky. We had hoped to have the side walls framed out and the walls up by December, but the work was going slowly. I often wished I had paid more attention in high school geometry, though thankfully I hadn’t forgotten everything. I think it’s all still in my brain somewhere, beneath fifteen years of other information.

Chuck, meanwhile, figured out how to use the saw to cut boards at a 45 degree angle. But in spite of our successes, the measurements were off for our side walls. We noticed this when the studs were slanting toward each other at the top. We then realized that the base was 2″ wider than the top (116″ vs. 114″), which meant that the boards for the roof pitch were too short. We used the mallet to try to beat one of the side walls into shape, only to have the wall fall apart.

In these situations, it’s better to start over anyway. We figured out where we had gone wrong, and now we just needed to know how much longer the top boards should be. We needed Pythagoras.

Luckily, the sands of time had left the Pythagorean Theorem unburied in my mind: a^2 + b^2 = c^2 .\,  Since we had the distance for “c” (our hypotenuse) and knew that “a” and “b” had to be equal, we were able to calculate the length needed rather than “guesstimating.” 116″ x 116″ (“c” squared) = 13,456 divided by 2 = 6,728, the square root of which is 82″. For some reason, we came up with 82.5″ that day, and it worked.

The walls are nearly finished. We still have to frame out a couple of windows, but then we will be ready to raise the walls. As a precaution now that winter has begun here in Arkansas, we left the front wall down and stacked the other walls on top of it. To ensure that rain would not fill the ruts between studs, we placed OSB board on top and then the tarp.

What we need next are several nice days during which we can finish framing the windows, raise the walls, and start nailing the rafters up to support the walls. Chuck’s Spring Break is seven weeks away, but there’s no guarantee that the first week of March will be lovely, or even remotely conducive to working outdoors. Last year we had a late snow that week.

Until then, we can cut grooves in the rafters, continue planning, and rest up for our next chance!

Side Walls

We were lucky this week to have two beautiful work days. The side walls are partially framed after a good bit of figuring, deductive reasoning, and internet research. I learned what a 12/12 pitch is/looks like as well as how to cut boards at a 45 degree angle. However, I am still not bold enough to do my own cutting. Aside from being slightly terrified (remembering Frost’s poem “Out, Out”), I’m left-handed. The saw is clearly designed for the other 70% of the world.

I do, however, nail. It’s a great stress-reliever, and the metal hammer makes a lovely sound on 3” nails, like a coin hitting water in a fountain. And the pitch changes the further the nail goes in.

But in spite of my love of nailing (or perhaps because of it), I managed to pull a muscle in my armpit. It has spent the past few days randomly cramping and releasing, reminding me that not all things are “mind over matter.”

We had hoped to have all four walls up, but we ran out of 2” x 4” x 12’ boards, which was just as well since we also ran out of steam. We did, however, get the gravel pile moved to what will eventually be the back porch area (courtesy of two helpful teenagers) as well as finished weed-eating a patch of grass invading the neighbor’s yard.

Highlights included thousands of blackbirds flying overhead, finding a rain puddle that might one day make a nice koi pond, and hours of breathing fresh, clean air.

Monday kicks off three days of rain, after which holiday celebrations will fill our days. We’re hoping for rest, too, and dream of a tinier home.

Outdoor Toilet

Friends have been curious about the logistics of building a cabin while not having access to water or electricity. Our power tools are battery-operated, and we charge them at our other home. But what about when we spend the night in our camper, which we don’t currently have a generator for, much less water hookups?

Our Coleman lantern serves us well.

Sometimes we shower at a friend’s.

But there’s one thing we didn’t want to live without: a toilet.

We had a broken chair that Chuck reinforced with boards. He borrowed a jigsaw and cut a hole for a toilet seat. What’s beneath? A bucket with a little peat moss in it—magic, organic material that eliminates odor and helps with the composting.

I admit I was skeptical at first, but days later there is no smell, nor are there flies (and we’ve had some warm days). This potty chair currently sits in a private spot in the woods. We cover the chair with a tarp, but otherwise it’s open to the elements.

Most of us have heard the euphemism “when nature calls,” but an outdoor bathroom brings a whole other level of meaning to that expression.

Tiny Cabin: First Wall

We had three days off before Thanksgiving, and the weather was promising. The flood waters had receded, and our cabin had weathered it all. Schedules cleared, we set our alarms for five thirty each morning and drove an hour to the cabin site. The sun crested the God-forsaken Bradford pears to warm the 36 degree air.

The other days weren’t as cold, but they were breezy and sunless. Warming up wasn’t hard with plenty of gravel to shovel around the foundation. Six more inches of rain would soon be on the way.

Our days began and ended in the dark, a rhythm that my body actually welcomed. We were home by six with just enough energy left to eat, bathe, and fall asleep.

The first order of business was nailing down the sub-floor. If I had it all to do over, I’d buy the more expensive, sturdier boards. However, once the sturdy pallet wood floors are down, we won’t know the difference.

After buying 70+ boards, we began assembling the walls. Luckily, Chuck pays attention to measurements and drawing straight lines. I gave that up a long time ago…

We realized that the 2 ¼” nails weren’t cutting it—nailing one end loosened the other. I’m not sure why we thought they would; the directions were clear: 3 ½” nails. No problems there.

Nailing together the frame took only a matter of minutes. Framing the door and windows, however, required finesse. We had to consider not only the size, but also the placement and height, which meant we needed to know the floor plan. Anticipating this, we had already taped off the size of the cabin in our current living room. That’s right—the tiny cabin is smaller than our current living room!

We spontaneously decided that each door would have a transom window. We built the back wall as well, but we’re waiting to put it up. We covered everything with a 20’ x 30’ tarp and didn’t want it to invite a pond between the two walls.

The hard part now is coordinating time off with good weather. Three consecutive days should be enough to finish the shell, but that depends on forces beyond our control.

Building the Tiny Cabin Frame

The plans we have require nine deck blocks ($6.22 each/$55.98 total), two 2’ x 6’ x 16’s ($9/$18), and thirteen 2’ x 6’ x 10’s ($5.39/$70.07). We had spread the gravel, but we knew that the surface wasn’t level. So, once we set out the deck blocks, we not only had to make sure that the deck block itself was level, but that it was the same height as the other eight. The back right corner seemed to be higher than the rest, so we decided to make that one the measure. We knew the guesswork would take a while, but it is absolutely essential that the blocks be even. It’s worth the time and effort.

Building Materials: boards, joist hangers, insulation, and chicken wire

Building Materials: boards, joist hangers, deck block insulation, and chicken wire

We added gravel to raise the back left corner and then put a 2’ x 4’ x 16’ board between them. We then placed the level on the middle of the board. If the bubble lined up, we knew they were the same height. We were surprisingly good at judging how much gravel to add to make the four pillars the same, but the deck blocks themselves were rarely level on all four sides (the smaller the space to level, the more difference one millimeter makes). Chuck raised the heavy block while I added anything from stones to a fine layer of gravel dust. We also had to make sure that the surface was packed down well to reduce the chances of the block shifting.

First Nails

It was time to nail the boards together. We started with the same back corner. Chuck drilled holes first to make driving the nails easier. I held the boards and flush as possible as he nailed. We repeated the process until we had finished the outside perimeter. One of the boards split—the nail probably hit a knot in the wood—so Chuck reinforced it on the outside with additional nails. We might have replaced it altogether had the other end of it not already been nailed to the back board.

Luckily, it's not as bad as it looks.

Luckily, it’s not as bad as it looks.

We then used the square (an L-shaped ruler) to make sure the boards had gone together at a perfect right angle, which is harder than one might think. I held the long end of the ruler flush against the 2’ x 4’ x 16’, which we had decided was the board by which the angle would be measured. In a perfect angle, the short end of the L would fit perfectly up against the other board. In our case, however, the end of the ruler made contact with the board, preventing the rest of the ruler from making contact. It was about a millimeter off.

All is not lost when this happens. Chuck took the rubber mallet and hit the wood while I held it tight (obviously, we didn’t want to hit the wood while it was sitting in the carefully-placed deck block). The mallet bends the wood ever so slightly, and we were able to get more of the square flush against the board. It wasn’t perfect, though. Still, all is not lost: later, when we nail the plywood (or OSB) down to the frame, it will help cinch the discrepancies.

Cabin Frame

Between crouching, lifting, and concentrating, we were pretty worn out by the time we finished, nearly five hours after we started. We had hoped to put in all the cross-beams, but instead we had to cover them with the tarp and leave them for another day.

Gravel for the Tiny Cabin Site

We ordered a load of gravel–about 20 tons–and had it delivered to the site. The driver was nice enough to not only back up between the trees and dump a pile where the cabin will be, but also sprinkle the rest along the driveway, reinforcing what was already there and adding an additional strip.

On the day it was delivered, we had the first good rain in weeks. Of course, the downpour began just as the driver arrived and ended just as he was leaving.

gravel driveway

We went out to spread it the following Monday–a lovely, but sunny, 92 degree day. It was a bit warm for mid-October in Arkansas, but it’s been an odd year here.

Gravel 2

Whenever I worry that our 160 square foot cabin (plus loft) will be too small, I remind myself how much work it would be to build anything bigger. I’ve never built a house before, but I’ve noticed that in life, upgrading comes with additional commitments. For example, a nicer car comes not only with a higher payment, but also with higher insurance rates and maintenance costs. More specifically, just this weekend, I learned that buying a $99 cordless reciprocating saw also requires buying blades and a $130 battery and charger. What I originally guessed was a $100 purchase turned out to be $250.

A larger cabin may be in our future someday, but this is one adventure on which I prefer starting small.

Spread Gravel

An hour of spreading gravel was about all we could stand. This weekend we’ll make some small repairs to the camper–it should finally be cool enough to sleep there–and then buy the deck block and other materials we need to build the floor.

Hauling Dirt

Before we could break ground, we needed more of it. Dirt, that is. Lucky for us, there’s a mound not far from the building site.

dirt pile before

Dirt pile after

A wheelbarrow worked for the potholes, but not to the extent we needed.

The Conway Home Depot rents Bobcats for $249 + tax, and we would have had to haul it an hour both ways. We hoped we could do better by going local, so we called the first place that came up on a Searcy Google search and reserved one at a considerable discount, quite proud of ourselves.

Saturday morning Chuck and his best friend Dan pull up to a sketchy-looking house surrounded by a fence and a series of piecemeal shacks. It was a junkyard minus the Rottweiler.

The exchange went something like this:

Chuck: “Hello, I’m here to pick up the Bobcat.”

Man: “Bobcat?”

Chuck: “Yes, I called yesterday to reserve one for this morning.”

Man: [Blank look.]

Chuck: “I spoke to Curtis?”

Man: “Oh. Well, I’m Curtis.”

It turns out that the Bobcat was ready, but the trailer was in a shack, parked behind a forklift that, they soon discovered, was out of gas. That wouldn’t have been a problem had Curtis not directed Chuck to fill it up with a gas can that turned out to contain pink liquid and that would have to be siphoned before the forklift could be moved.

We were lucky that our work day turned out to be cloudy and an unseasonably cool 86 degrees because it took two hours just to rent and load the Bobcat.

Driving one of these things is a lot harder than it looks.

bobcat

And for future reference: they won’t go in reverse unless you first pull forward. It was sort of a metaphor for our day: going in the opposite direction before any ground could be gained.

While the guys figured out how to operate a machine whose switch labels had long worn off, my friend Laurie gave me ideas for laying out the future garden, taking a page out of the permaculture playbook, such as planting parsley, Echinacea, eggplant, and other herbs around trees to create their very own microclimate. We also scouted out strategic places for a fir and a fast-growing hardwood to create greater seclusion in front of the cabin. She also advised that the number of old, rotting trees on part of the land will make great fertilizer at the bottom of a raised bed. I could almost feel my brown thumb turning green.

Once the guys got the hang of operating the bucket via pedals and the right angle at which to charge the pile, we spread the dirt.

cabin site with dirtcabin spot with dirt

It took surprisingly little time to complete the task, so after a hard-earned lunch break, we finished out the driveway. Like the foundation of our cabin, the driveway will need gravel, but now it’s at least level with the ground around it.

dirt road from land

We left feeling pretty triumphant, even if later I discovered that I had provided a host of mosquitoes with their daily dose of iron. I had so many bites that they blistered—it felt like chicken pox all over again or the time I somehow managed to get poison ivy on my back. I’ll remember to re-apply the bug spray more frequently, and in the meantime, I’d like to give a shout out to my new best friend, the oatmeal bath.